Arduino Duemilanove as ISP: ST500K protocol errors due to Serial Reset
Years ago I wrote about using the Arduino Micro as an ISP for use with a standalone ATMEGA micro controller.
I used this again every now and then, but got to the point where I wanted sort of a more permanent setup. As I had a spare Duemilanove and some prototype boards lying around, all I had to get was a DIP28 ZIF socket and start soldering.
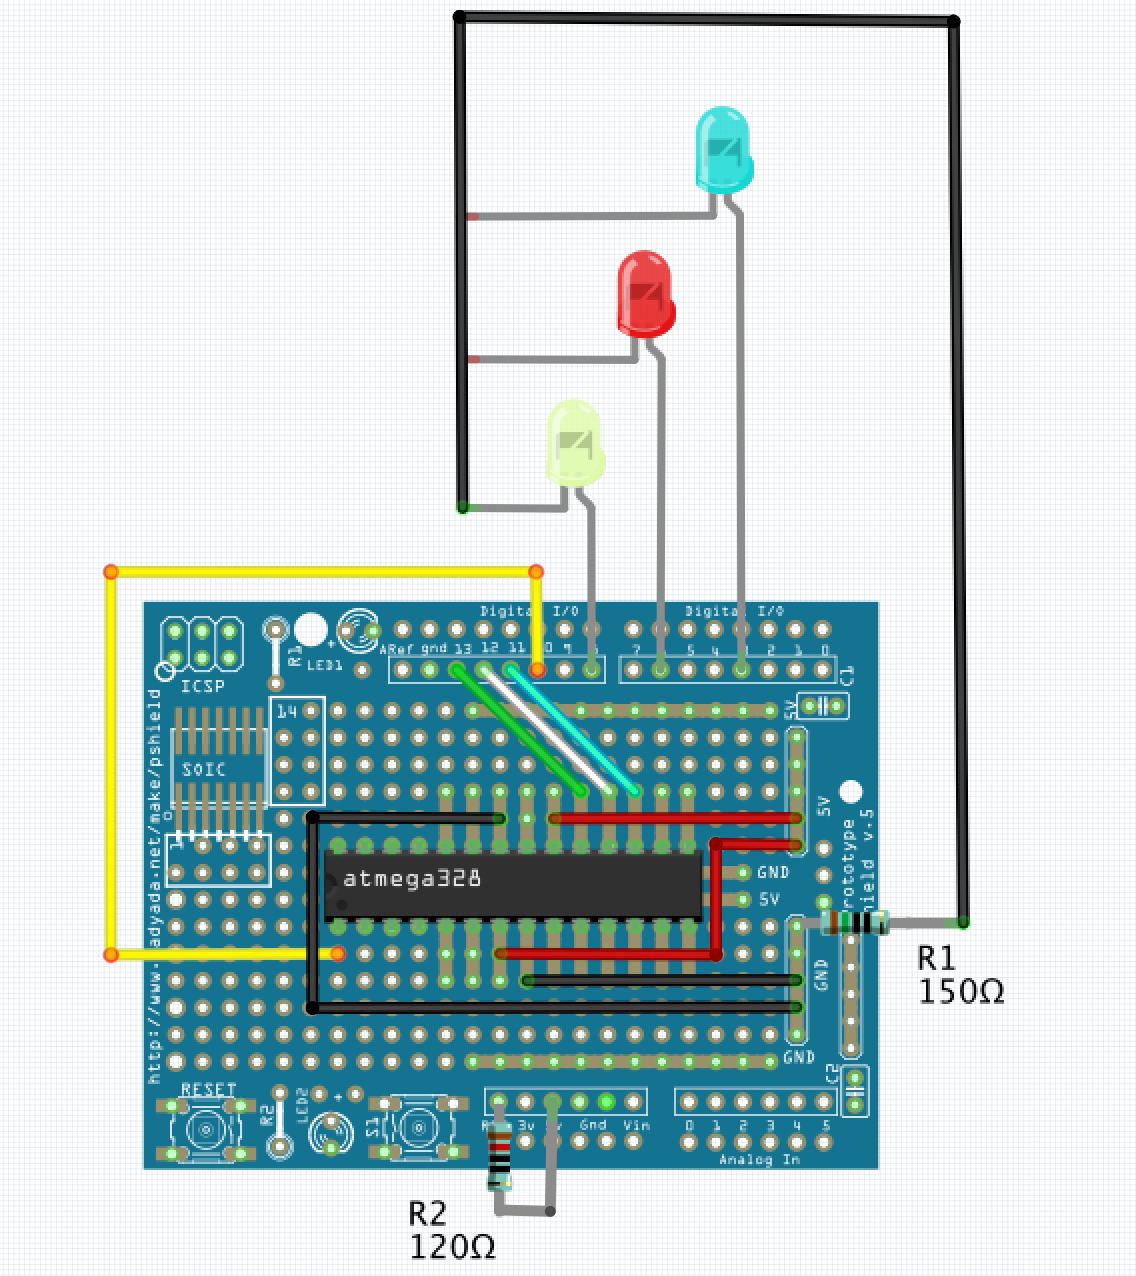
Here’s the Layout:
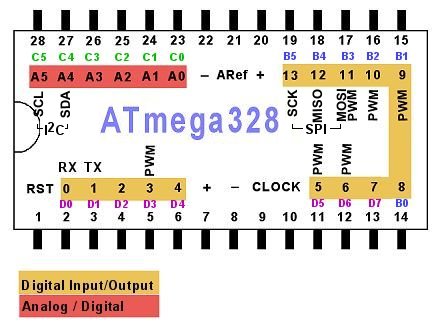
ATMEGA Pin 20 and 7 -> 5V

ATMEGA Pin 22 and 8 -> GND

RESET: ATMEGA Pin 1 -> Protoboard Pin 10

SCK: ATMEGA Pin 13 -> Protoboard Pin 13

MISO: ATMEGA Pin 12 -> Protoboard Pin 12

MOSI: ATMEGA Pin 11 -> Protoboard Pin 11

Yellow LED Anode -> Protoboard Pin 8

Red LED Anode -> Protoboard Pin 6

Green LED Anode -> Protoboard Pin 3

All LED Cathodes -> GND (attach a 150 Ohm resistor)

On the Protoboard, connect RSET and 5V through a 120 Ohm pull-up resistor
With this setup, I opened the ArduinoISP sketch included with Arduino IDE.
In my old tutorial I recommended downloading the sketch from Github, this has become obsolete.
The one include with recent versions Arduino IDE is far more advanced.
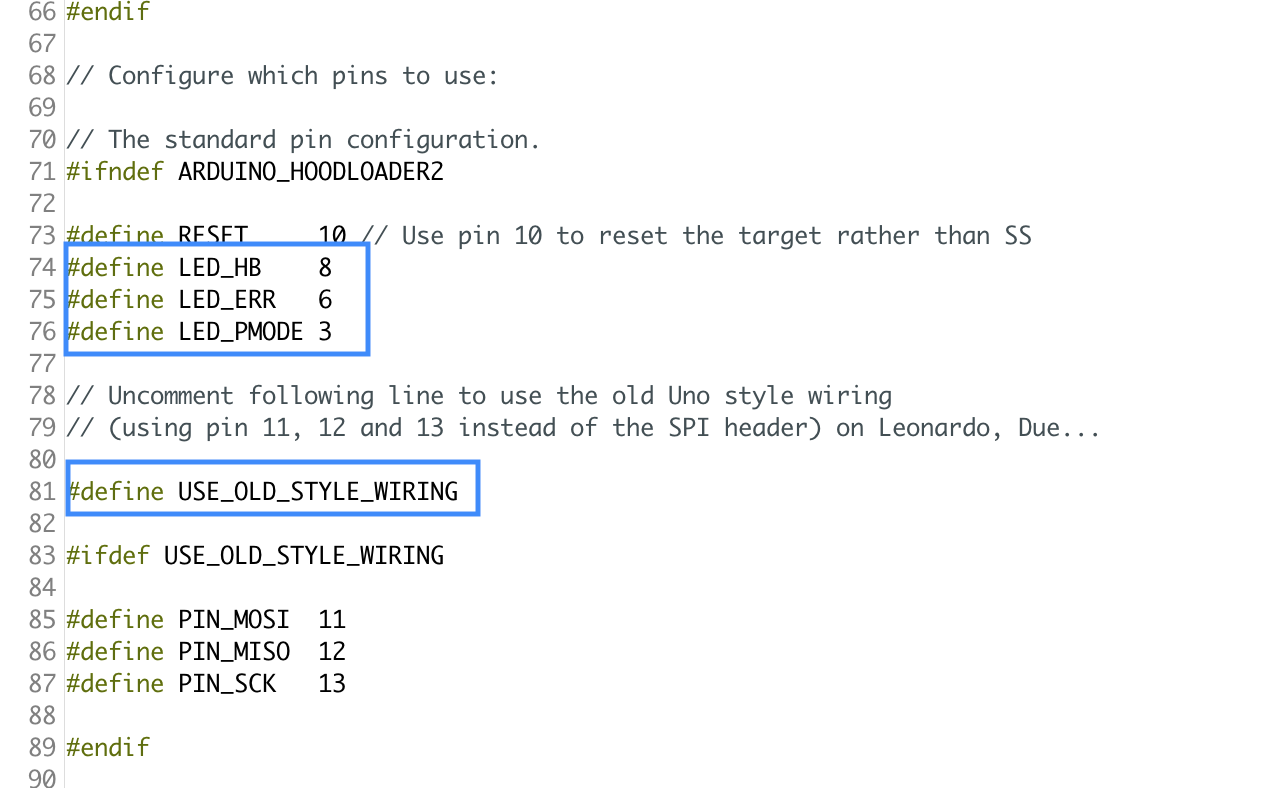
I had just these minor things changed in the sketch:
With this loaded onto the Duemilanove I could finally use it it burn standalone micros like a charm.
So, I took the solution upfront. This works for me.
The problem I had up to this point was a very unpleasant behaviour while burning the bootloader onto the micro, where I consistently got errors like these:
/Applications/Arduino.app/Contents/Java/hardware/tools/avr/bin/avrdude -C/Applications/Arduino.app/Contents/Java/hardware/tools/avr/etc/avrdude.conf -v -patmega328p -cstk500v1 -P/dev/cu.usbserial-AH01GO57 -b19200 -e -Ulock:w:0x3F:m -Uefuse:w:0x05:m -Uhfuse:w:0xDA:m -Ulfuse:w:0xE2:m
avrdude: Version 6.3, compiled on Jan 17 2017 at 12:01:35

Copyright (c) 2000-2005 Brian Dean, http://www.bdmicro.com/

Copyright (c) 2007-2014 Joerg Wunsch
Using Port : /dev/cu.usbserial-AH01GO57

Using Programmer : stk500v1

Overriding Baud Rate : 19200

avrdude: stk500_getsync() attempt 1 of 10: not in sync: resp=0x15

avrdude: stk500_getsync() attempt 2 of 10: not in sync: resp=0x15

AVR Part : ATmega328P

Chip Erase delay : 9000 us

PAGEL : PD7

BS2 : PC2

RESET disposition : dedicated

RETRY pulse : SCK

serial program mode : yes

parallel program mode : yes

Timeout : 200

StabDelay : 100

CmdexeDelay : 25

SyncLoops : 32

ByteDelay : 0

PollIndex : 3

PollValue : 0x53

Memory Detail :
Block Poll Page Polled

Memory Type Mode Delay Size Indx Paged Size Size #Pages MinW MaxW ReadBack

----------- ---- ----- ----- ---- ------ ------ ---- ------ ----- ----- ---------

eeprom 65 20 4 0 no 1024 4 0 3600 3600 0xff 0xff

flash 65 6 128 0 yes 32768 128 256 4500 4500 0xff 0xff

lfuse 0 0 0 0 no 1 0 0 4500 4500 0x00 0x00

hfuse 0 0 0 0 no 1 0 0 4500 4500 0x00 0x00

efuse 0 0 0 0 no 1 0 0 4500 4500 0x00 0x00

lock 0 0 0 0 no 1 0 0 4500 4500 0x00 0x00

calibration 0 0 0 0 no 1 0 0 0 0 0x00 0x00

signature 0 0 0 0 no 3 0 0 0 0 0x00 0x00
Programmer Type : STK500

Description : Atmel STK500 Version 1.x firmware

avrdude: stk500_getparm(): (a) protocol error, expect=0x14, resp=0x14

avrdude: stk500_getparm(): (a) protocol error, expect=0x14, resp=0x02

avrdude: stk500_getparm(): (a) protocol error, expect=0x14, resp=0x10

Hardware Version: -1449398444

Firmware Version: -1073745528.444305

Topcard : STK502

Vtarget : 1.8 V

Varef : 0.0 V

Oscillator : Off

SCK period : 0.1 us
avrdude: stk500_initialize(): (b) protocol error, expect=0x10, resp=0x01

avrdude: initialization failed, rc=-1

Double check connections and try again, or use -F to override

this check.
avrdude: stk500_disable(): protocol error, expect=0x14, resp=0x10

avrdude done. Thank you.

Error while burning bootloader.
While I never observed this misbehaviour when using the Arduino Micro, the Duemilanove constantly refused to burn to the chip.
Unfortunately, there seems to be gazillions of people observing the very same error, but afar from “check the cabling”, “check blahblah”, there seems to be not much help on this matter. On the other hand, there are obsiously people, who never encountered this issue. Or it is device or implementation dependenant respectively.
Only after hours of searching and reading, I found some people mentioning similar issues with serial programmers and how they got away with disabling serial signals. That very moment I remembered reading about Arduino doing Reset on Serial many years ago.
I don’t know, why this is not mentioned already in of the Arduino as ISP context (it should, I thinkg). At least there is official documentatio on how to disable reset on serial.
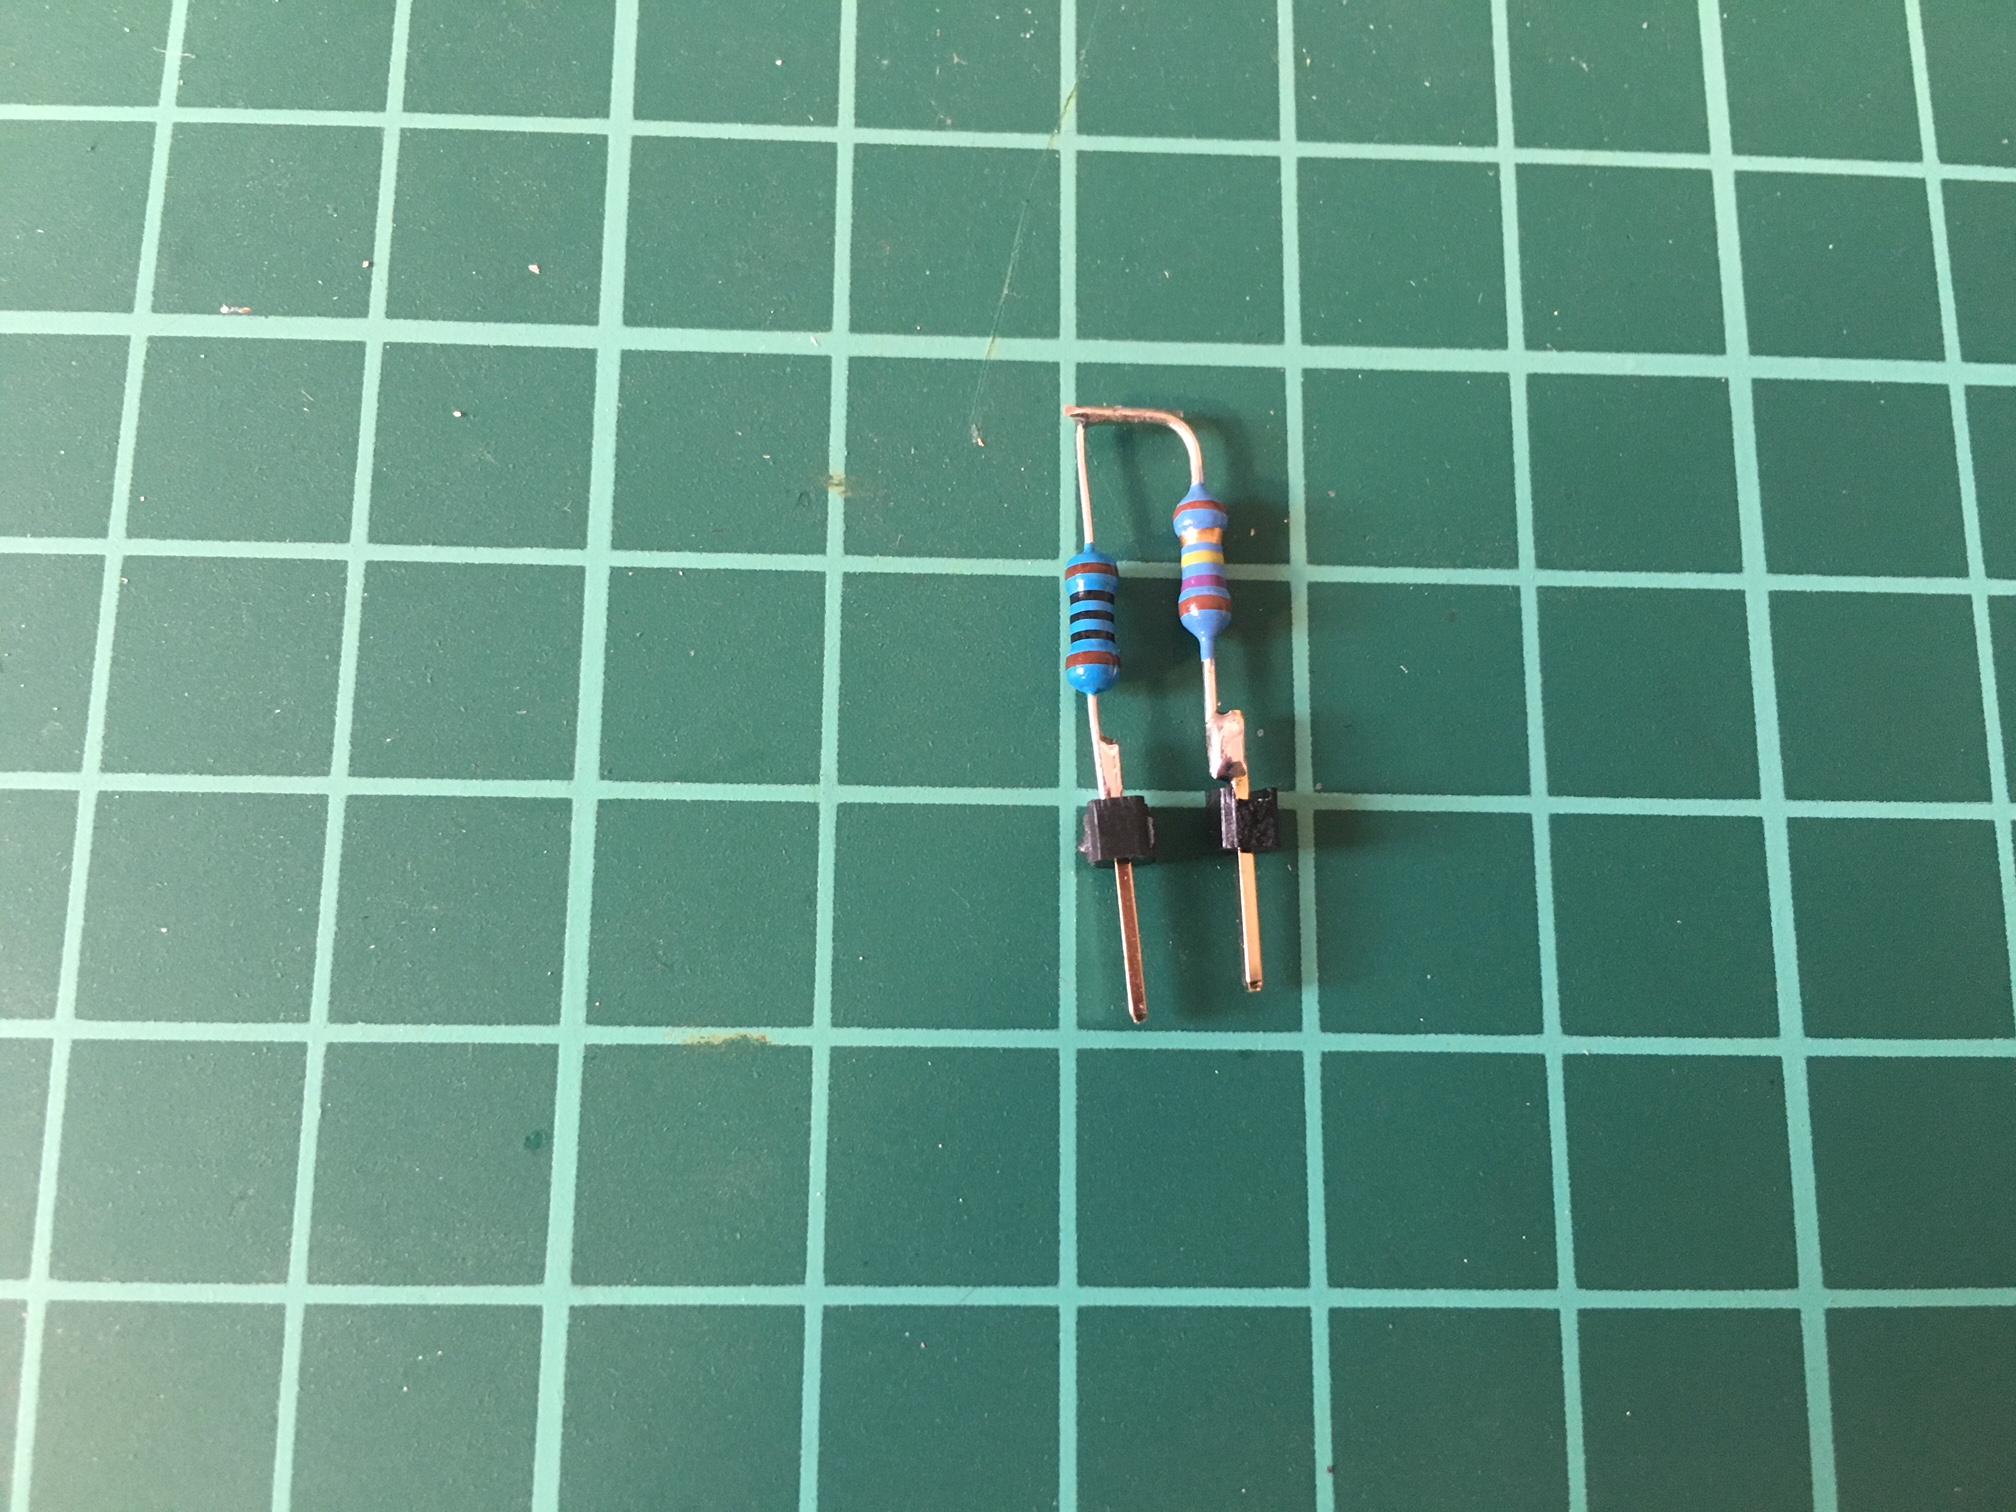
There’s multiple solutions, from soldering, to just sticking restistors. Since I didn’t want to tamper with the Arduino PCB, I’ve just added a removable resistor between RST and 5V. Since I didn’t have a 120 ohm resistor at hands, I had to combine a 100 and a 20 ohm resistor to achieve the same effect.
Weehee! With the resistor in place, it finally works the way it should.